The ‘System Thread Exception Not Handled’ problem is frequently experienced by users. Windows, created by Microsoft, is one of the most efficient and dependable operating systems ever devised in the digital world’s history.
It has been satisfying clients for almost three decades, which explains why it has done so well. Over the years, it has provided a plethora of advantages to its users. However, they are insufficient to compensate for the minor drawbacks.
Windows, like all operating systems and tools in the digital world, is vulnerable to certain mistakes. It is still created and improvised by a bunch of humans who are all capable of making errors. Windows occasionally displays problems and malfunctions that limit some of its capabilities.
There are a variety of causes for the System Thread Exception Not Handled problem, but the most common cause is incompatible drivers.
It is most likely to happen when your computer is booting up. If you get the System Thread Exception Not Handled issue, you won’t be able to log into Windows, which means you won’t be able to accomplish any other operations or activities.
Understanding “System Thread Exception Not Handled”
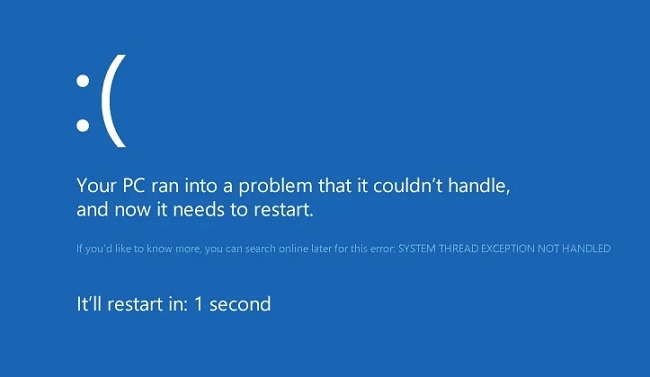
The “System Thread Exception Not Handled” error is a specific type of Blue Screen of Death (BSOD) error that occurs in Windows operating systems.
This error typically signifies a critical system-level issue where a thread in the operating system encounters an exception or error that it cannot handle. As a result, the system crashes to prevent potential damage or data loss.
When this error occurs, your computer will display a blue screen with the error message, and then it will restart. Understanding the meaning of this error is crucial for effective troubleshooting and ensuring the stability of your Windows system.
Read Also:
Causes of the “System Thread Exception Not Handled” Error
The “System Thread Exception Not Handled” error can be triggered by various underlying causes, including:
- Outdated or Incompatible Drivers: One of the most common reasons for this error is outdated or incompatible device drivers, particularly graphics card drivers.
- Software Conflicts: Conflicts between software or incompatible programs running on your system can lead to this error. This includes third-party antivirus software.
- Corrupted System Files: System files that are corrupted or missing can cause this error. These files are essential for the proper functioning of Windows.
- Hardware Issues: Faulty hardware components, such as RAM or hard drives, can trigger BSOD errors, including this one.
- Overclocking: Overclocking your CPU or GPU beyond stable limits can result in system instability and BSOD errors.
- Malware or Virus Infections: Malware or viruses can compromise system files and lead to errors like “System Thread Exception Not Handled.”
Now that we understand the meaning and potential causes of the “System Thread Exception Not Handled” error, let’s explore methods to resolve it effectively.
How to Resolve the Error System Thread Exception Not Handled
Now that you know everything there is to know about the System Thread Exception Not Handled problem, you can see why it might be frustrating for those who encounter it.
Not to worry; you’ve come to the right place if you’re looking for a way to fix the System Thread Exception Not Handled problem. Here are a few things you can do on your own to get it off your computer and get back to work:
Method 1: Rename the Dilemmatic Driver
Step 1- To begin, insert the ‘Windows Recovery Drive or System Repair Disk’ and select the language you want to use. Click ‘Next’ when you’re finished.
Step 2 – Select ‘Repair’ from the drop-down menu on the left side of your screen.
Step 3- Go to ‘Troubleshoot’ and then ‘Advanced Options.’
Step 4 – Go to ‘Command Prompt’ to open it once you’ve been routed.
Step 5 – Type the command below into the prompt exactly as it is written:
C:cd\windows\system32\drivers\sren FILENAME.OLD FILENAME.SYSFILENAME.SYSFILENAME.SYSFILENAME.SYSFILENAME.
Step 6 – Press the ‘Exit’ key, then restart your computer.
Method 2: Immobilize Hardware Acceleration Not Opening Windows Key Not Working DNS Probe Finished Bad Config
Step 1- First, open the Google Chrome browser and go to ‘Settings.’
Step 2 – Select ‘Advanced Settings’ from the drop-down menu and click it.
Step 3 – Look for the option ‘Use Hardware Acceleration When Required’ under the heading ‘System.’ It should be unmarked.
Step 4- Save your modifications and then close the browser. Restart your computer after that.
Method 3: Remove the Error-Producing Driver
Step 1– To begin, hit the Windows key and the letter ‘X’ at the same time. Select ‘Command Prompt’ from the option that appears.
Step 2 – Type the following command into the prompt exactly as it appears on the screen and click Enter:
legacy bcdedit /set default bootmenupolicy
Step 3 – Your computer’s advanced legacy boot will now be enabled. Exit the command prompt and restart your computer after you’re finished.
Step 4 – Next, keep pressing the F8 key to bring up the ‘Advanced Boot Option’ on your screen.
Step 5 – When it appears, choose ‘Safe Mode’ and then continue.
Step 6 – In the Run box, type “devmgmt.msc,” and you’ll be transported to the Device Managers.
Step 7 – Select the problematic drivers from the list and uninstall them. Click ‘OK’ to confirm each Uninstallation.
Step 8 – Once you’ve finished, go to the manufacturer’s website and download the most recent version of each driver.
Step 9 – After all of the procedures have been finished, restart your computer.
Method 4: Restore Your Computer To A Previous State
Step 1 – Begin by connecting the Windows Installation Media or Recovery Drive and choosing your favourite language.
Step 2 – At the bottom of your screen, you’ll see the option ‘Repair your Computer.’ Select it by clicking on it.
Step 3- Go to ‘Troubleshoot’ and then ‘Advanced Options.’
Step 4 – After being routed, select ‘System Restore.’ On the next screen, you’ll be given instructions on how to restore your computer. They must be followed to the letter.
Step 5 – When you’re finished, restart your computer. This will put the steps you just took into action.
Easy Methods to Fix the “System Thread Exception Not Handled” Error
Here are practical methods to address the “System Thread Exception Not Handled” error and restore the stability of your Windows system:
- Update Device Drivers:
- Ensure that all your device drivers, especially graphics card drivers, are up to date. Visit the manufacturer’s website for the latest driver versions and install them.
- Uninstall Problematic Software:
- Identify any recently installed or updated software that might be causing conflicts. Uninstall or roll back those programs to a previous version to see if it resolves the error.
- Run System File Checker (sfc):
- Open Command Prompt as an administrator and run the command “sfc /scannow.” This will scan and repair corrupted system files that may be causing the error.
- Check for Windows Updates:
- Make sure your Windows operating system is up to date by installing the latest Windows updates and patches.
- Test Your Hardware:
- Use built-in Windows diagnostics or third-party hardware testing tools to check for hardware issues, particularly RAM and hard drives.
- Disable Overclocking:
- If you’ve overclocked your CPU or GPU, revert to default clock speeds to eliminate instability as a potential cause.
- Perform a Clean Boot:
- Use the System Configuration utility (msconfig) to perform a clean boot, disabling unnecessary startup items and services that could be conflicting with your system.
- Scan for Malware and Viruses:
- Perform a thorough malware and virus scan using reputable security software to ensure your system is clean from malicious software.
- Check for Memory Dump Files:
- Analyze memory dump files generated during BSOD crashes using tools like WinDbg to pinpoint the specific driver or component causing the error.
- Perform a System Restore:
- If you suspect that recent changes or installations triggered the error, consider performing a System Restore to revert your system to a previous state when it was stable.
- Reinstall Windows (Last Resort):
- If all else fails and the error persists, you may need to reinstall Windows to resolve deep-seated issues. Ensure you back up your important data before proceeding.
Read Also:
Conclusion
All of the remedies we have for you to try to fix the system thread exception not handled problem are listed above. These approaches may not be the best for your machine, but one or more from the list above will almost certainly cure your problem.
They may also be useful in dealing with other issues such as the ‘Windows 10 Random Restart’ or the ‘Windows 10 Slow Shutdown Error.’ However, if they do not fix your problem, you might want to get help from a formal operator.

